Kitchen grease builds quickly because hot cooking oil, steam and splatters form a sticky film on cabinets, countertops and appliances. A realistic 30-minute grease-cleaning routine can restore shine using minimal tools, a clear step-by-step order and tested hacks that actually work.
What You’ll Need (Quick Checklist)
Here are the essential supplies:
White vinegar
Dish soap (a grease-cutting type)
Baking soda
Microfiber cloths or paper towels
Sponge and scrub brush
Spray bottle
Bucket of warm water
Optional: lemon juice, degreaser spray, old toothbrush, gloves
DIY natural degreaser mix: Combine ½ part white vinegar + ½ part warm water + a few drops of dish soap.
The 30-Minute Grease-Cleaning Plan (Step-by-Step Timeline)
Step 1 (0-5 minutes): Declutter and Prep
Remove dishes, utensils and any countertop clutter so you have clear space.
Quickly wipe up crumbs so you won’t spread grease around.
Open a window or turn on the exhaust fan for some airflow.
Step 2 (5-10 minutes): Tackle the Greasy Surfaces First
Focus on the stovetop, backsplash and range hood — these are grease hotspots.
Spray your DIY degreaser (or a store-bought one) and let it sit for 2–3 minutes.
Wipe in circular motions using a warm, damp cloth.
Use a scrub brush or an old toothbrush for corners and vent filters.
Step 3 (10-18 minutes): Cabinets and Countertops
Wipe upper cabinets near the stove (a lot of grease gathers here).
Use a vinegar-water mix or a small baking soda paste for stubborn film. (Baking soda + a bit of water makes a gentle scrub for sticky surfaces.)
Clean countertops using a mild dish soap solution.
Dry with a clean towel to bring back shine and avoid streaks.
Step 4 (18-25 minutes): Appliances
Wipe the exterior of the microwave and its handle (a vinegar-damp cloth works well).
Clean fridge doors and handles — greasy hands touch these more than you think.
For stainless-steel surfaces, wipe with a soft cloth and buff dry (you can apply a drop of oil to restore the finish).
Step 5 (25-30 minutes): Sink and Final Touches
Scrub the sink area using dish soap and a bit of baking soda for any oily residue.
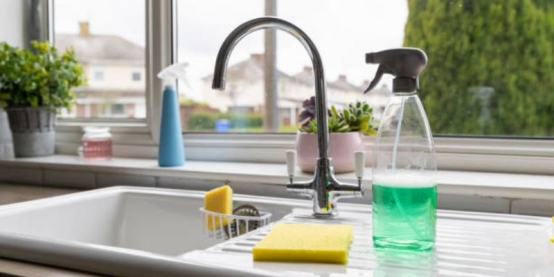
Wipe down the faucet — it often catches splashes and film.
Mop or wipe the floor areas near the stove (grease tends to land there).
Empty the trash if it contains greasy paper towels or food wrappers.
How to Handle Tough Grease (If 30 Minutes Isn’t Enough)
If some areas are heavily built-up:
Use a baking soda paste + warm water soak for stubborn film.
Use a steam method: boil a vinegar-water mix in the microwave so steam loosens the grime, then wipe clean.
Use a “magic eraser” or oil-based cleaner for spots where film has hardened.
If the kitchen is used heavily, repeat this routine on a 2-day rotation until the buildup is under control.

Maintenance Tips to Keep Grease Away Longer
Wipe the stove and counters daily after cooking (takes ~3 minutes).
Deep-clean range hood filters once a month to avoid heavy buildup. Use splatter guards or a lid when frying to reduce airborne oil.
Spray a lightly diluted vinegar solution on cabinets weekly to prevent film.
Keep microfiber cloths handy for quick wipe-downs before grease sets.
How to Prevent Kitchen Grease Before It Starts
Preventing grease from building up saves time and keeps your kitchen surfaces easier to maintain.
Cook with lower heat when possible. High temperatures release more oil vapours that cling to nearby surfaces.
Position pans correctly. Center cookware under the vent or hood to trap rising steam.
Use lids and splatter screens. They stop oil particles before they land on cabinets and tiles.
Keep airflow steady. Turn on your range hood or open windows while cooking.
Wipe right after cooking. A warm surface lets grease lift off easily without scrubbing later.
Following these small habits prevents thick buildup and keeps your next 30-minute cleaning session truly quick.
Eco-Friendly & Budget Cleaning Options
Substitute store-degreasers with homemade mixes: vinegar, water, dish soap, and baking soda.
Choose zero-waste cloths (microfiber or reusable cotton) instead of disposable wipes.
Compare cost: a homemade mix costs cents vs. a premium degreaser at multiples of that.
Use lemon juice for added degreasing power and a natural fragrance.
Best Store-Bought Degreasers Worth Trying
Not everyone has time for DIY mixes. Here are a few reliable degreasers that remove sticky kitchen residue quickly:
Krud Kutter Kitchen Degreaser: Biodegradable and safe on most surfaces, ideal for range hoods and microwaves.
Method Heavy Duty Degreaser: A plant-based option with strong oil-cutting ability and pleasant scent.
Simple Green All-Purpose Cleaner: Concentrated and cost-effective for large kitchen areas.
Goo Gone Kitchen Degreaser: Works well for oven doors and baked-on grease.
When selecting a cleaner, always check labels for “non-abrasive” and “food-safe” to protect your surfaces and keep indoor air fresh.
Common Mistakes to Avoid
Using too much water on wooden cabinets can warp the finish.
Mixing vinegar and bleach (strong chemical reaction, unsafe).
Scrubbing with abrasive pads and scratching surfaces or stripping finishes.
Ignoring range hood filters or stove knobs (which often hide grease).

Quick Recap: The 30-Minute Routine in One Glance
0-5 min: Declutter & prep
5-10 min: Degrease stovetop & hood
10-18 min: Wipe cabinets & countertops
18-25 min: Clean appliances
25-30 min: Finish with sink & floor
Final Thoughts
A clean kitchen isn’t about spending hours—it’s about following a smart system. By doing this 30-minute grease-cleaning routine regularly and pairing it with simple maintenance habits, the grease that builds up will be easier to stay ahead of. The goal is consistency and speed rather than rare deep-clean marathons.